I almost forgot to mention the awesome deal that I found at Bath & Body Works. These little pouches were sitting so cutely in baskets I'll admit, very strategically, by the checkout line. Impulse shopping? Why, YES thank you! These really are so cute, though, you have to admit... and for $2.50 how could you pass up something that fits so snugly in your purse? This little cutie will work perfectly for those last minute, didn't bring along your normal grocery bags, "I need eggs and shampoo," shopping trips. No more plastic bags for me!
Pin It Now!
Friday, February 26, 2010
Hand Soap
Yesterday I had a little shopping excursion to Bath & Body Works to buy some hand soap. Even though we are on a very tight budget I allow myself this one little indulgence. In these days of store brand products and waiting to buy till the sales come back, I still go about every other month to stock up on my Coconut Lime Verbena, Apricot Mint, Rain Kissed Leaves, Black Raspberry Vanilla, Brown Sugar and Fig, Midnight Pomegranate, oh the list goes on and on! I love these soaps. Seriously, I can't live without them.
Do you have anything that you still indulge in? Please share the items in your house that you can't bare to forgo in these tough times.
I have to admit, I was a little put off by the newly designed pump and container. The look is growing on me but the pump will take some more getting used to; it gets stuck and then when I push down harder it forcefully comes out and squirts soap across the whole sink and on my shirt. Not very nice.
Pin It Now!
Thursday, February 25, 2010
Cornbread
I've been sharing this recipe a lot lately and I just now took a glance at the original post on my blog... what a strange layout! I don't know exactly what I was thinking, but I was definitely not thinking about my readers with such an odd flow of words and photos. So ladies and gents, I now present to you an updated Cornbread Recipe!
Cornbread
Ingredients
2 boxes Jiffy Corn Muffin Mix
1 box Jiffy Yellow Cake Mix
3 eggs
1 cup milk
Cornbread
Ingredients
2 boxes Jiffy Corn Muffin Mix
1 box Jiffy Yellow Cake Mix
3 eggs
1 cup milk
1/3 cup oil
cinnamon, for sprinkling
cinnamon, for sprinkling
Directions
Preheat oven to 335 degrees F. In a medium mixing bowl, combine all ingredients except for cinnamon. Whisk together by hand until relatively smooth, about 45 seconds. Pour batter into 9x13, greased pan. Sprinkle cinnamon on top and swirl in gently using whisk.
Bake for 35 minutes, check with toothpick.
Delicious, moist, flavorful, and goes with anything!
Pin It Now!
Wednesday, February 24, 2010
And it begins....
Something has been missing in my life over the past few months, that missing piece is gardening. I absolutely loved my little garden in Michigan and probably became too attached to some of the plants. I even had a dream last night about going back to my garden and being absolutely heartbroken that the new owner hadn't watered anything for the whole summer. No flowers, no hostas, no hydrangea... just dirt and twigs. I woke up very upset. Yeah, I became way too attached.
Pin It Now!
It's about time to start a new garden down here in Texas. I've been doing some research today to find where to begin this task. Literally, I know nothing about gardening in Texas! It's like starting from scratch all over again.
This is the book I will need: Neil Perry's Complete Guide to Texas Gardening
This is the place I will go: Montgomery County Master Gardeners Association
And this is the blog where I will get all my ideas: Donald's Texas Garden
Sunday, February 21, 2010
Faux-Bois Planters
I received a new Living magazine in the mail today, completely out of the blue and unexpected. I have my sneaking suspicions as to who may have renewed my subscription (thank you, Mami, if it was you). I love those little surprises that come in the mail!
 I was reading through it this evening, loving all the gorgeous photos and beautifully written articles, when I came across a craft that I am definitely going to do soon.
 Isn't this faux-bois planter the most fantastic thing you've ever seen? Ok, maybe not the most fantastic, but it's at least up there on your list of awesomely-inexpensive crafts. It's made by pouring "hypertufa" mixture between two vessels and sitting for a few hours.
The mixture consists of equal parts perlite, peat moss, Portland cement, and enough water to reach the desired consistency. So simple! Click the photo to see detailed instructions on how to make this particular planter.
Saturday, February 20, 2010
Chic Leather Finds
I just found a fellow blogger from my own heart. The Sale Rack is "a blog about how to save money without compromising your taste or lifestyle." How fantastic is that?! Even better is that she offers some giveaways that are chic and usable merchandise. Her most recent giveaway was from a company called Graphic Image. I just did some browsing and I love their leather bound items. Plus, they offer personalization on almost all their products. Classically chic, perfect! Click on the images to shop.
Pin It Now!
Seven Daughters wine
I love this wine.
That's about all I can coherently type out right now.
Hey, that bottle didn't empty itself last night. Pin It Now!
Friday, February 19, 2010
Cheesecake bites
Could it be?! Did I just save that hideous excuse for a cheesecake? Why, yes I did!
Cheesecake (maybe?)
I'm scared. Really scared.
This cheesecake is ugly as sin and I don't know if I even want to try it. I'm posting it because this is my very first attempt and I realize that not everything comes out perfectly the first time. Plus, I learned a lot from this recipe. I learned that a cheesecake is done when it completely puffs up and will not necessarily be done at the allotted time... this one took an hour longer! I also learned that poking it every 10 minutes with a toothpick to see if it's done yet (geez!) is not such a good idea. I completely mutilated this thing! Hopefully I will have better luck next time. Try, try again.
Update I made this particular cheesecake for a dinner party that I'm going to tonight and I've been completely spastic, thinking and stressing about this flippin' dessert! I actually went out and bought some raspberries for a glaze/topping after researching some recipes. So I came home, cooked up some topping, poured it onto the cheesecake. Then I did more research, found out that you shouldn't pour the topping on while it's still hot (which I did!) and that you shouldn't pour it on until you are ready to serve it or it will get soggy(I poured it on at least 3 hours before serving). I completely FREAKED out and decided to just scrap the whole idea and make brownies. But before scrapping it, I took one little slice out to try. Wouldn't ya know, it tastes great and I devoured the whole slice! That's what ya get for freakin' out. Geez Louise. Pin It Now!
Thursday, February 18, 2010
The Rusted Chain giveaway
 I think I would be Teacher Chick... or maybe Happy Chick, but that's only part time. =P
I love a good giveaway!
Check out Beki's blog to express what kind of chick you are to get a chance to win (and to cheer her up today). Pin It Now!
Spinach Salad with Sesame Vinaigrette
I've fallen in love with this easy recipe for a super healthy salad from my Cooking Light cookbook. It's very quick and perfect for a mid-day snack. I whipped this one up right before tutoring today; I don't want to be a hungry grouch for the poor boy!
Sesame Vinaigrette
1 1/2 teaspoons dark sesame oil
1 1/2 tablespoons fresh lemon juice
1 tablespoon soy sauce
1 tablespoons honey
dash of salt and pepper
Stir together with a whisk. Place spinach in a large bowl and drizzle vinaigrette, tossing gently. Or you can drizzle a tiny bit over a serving of spinach and save the rest of the vinaigrette, a little goes a long way!
Feedback
Alright everyone, I need your help. I've done some changes to the layout of The Cutest Little House in Town blog and I need your feedback! What do you think of the new header image? Is it too big? I sized it to fit my monitor but I'm not sure how it looks on other monitors. I also went and tweaked some of the HTML code to get rid of the pesky blogger outline around the header image and added my own to the image itself. Does everything look normal to you? I'm not a very techy person, so I just want to make sure that I edited the right code.
Wednesday, February 17, 2010
Happy Blogiversary!!!
I can't believe that it's been an entire year since I began this little blog. I've been through an awful lot since beginning it, that's for sure. The Cutest Little House in Town blog began as a chronicle of my experiences as a first time home owner... keeping track of every home update and every garden tip throughout the year. Apparently, those tips were all worth while because now someone new is loving that cute little house. Since then, this blog has evolved to hopes and dreams for my future home along with the occasional recipe or two. One day, hopefully sooner than later, I will have another cute little house to blog about. Until then.....
Just keep blogging, just keep blogging... what do we do? We blog, blog, blog!
In the meantime, I have a true first to share with you. Today was the very first time I peeled an apple in one complete piece. Check out the pic! I have proof! In honor of my blogiversary, I made a delicious apple cake. This is by far my absolute favorite recipe and it deserves a second posting. Enjoy!
Apple Cake
Ingredients
3 cups all-purpose flour
2 teaspoons ground cinnamon
1 teaspoon baking soda
1 teaspoon salt
1 cup (2 sticks) unsalted butter, at room temp
1/4 cup vegetable oil
2 cups sugar
2 teaspoons vanilla extract
3 large eggs, at room temp
4 cups apples (3-4 large apples), peeled, cored, and cut into 1/2-inch cubes
1 teaspoon cinnamon mixed with 1 tablespoon sugar for topping
Directions
- Preheat oven to 350 (340 works better in mine, play around with what you like). Lightly grease a 10-inch tube pan with a removable bottom.
- Sift the flour, cinnamon, baking soda, and salt into a small bowl.
- Cream the butter, oil, sugar, and vanilla in a medium-size mixing bowl with an electric mixer on medium speed until blended, about 2 minutes. Stop to scrape the bowl twice with a rubber spatula.
- Add the eggs one at a time, and mix on medium-low speed after each addition until blended, 10 seconds. Scrap the bowl each time. Once the eggs are added, mix again for 10 seconds.
- Add half the dry ingredients and blend on low speed for 15 seconds. Scrap the bowl, add the rest of the dry ingredients, and mix on low speed until blended, about 5 seconds more.
- Add the apples with a few turns of the mixer.
- Spoon the batter into the pan and sprinkle the cinnamon-sugar over the top. Bake the cake on the center oven rack until the top is firm and golden and a toothpick inserted at the cake's highest point comes out dry, about 1 hour and 5 minutes.
Pin It Now!
Tuesday, February 16, 2010
Fab Kitchen
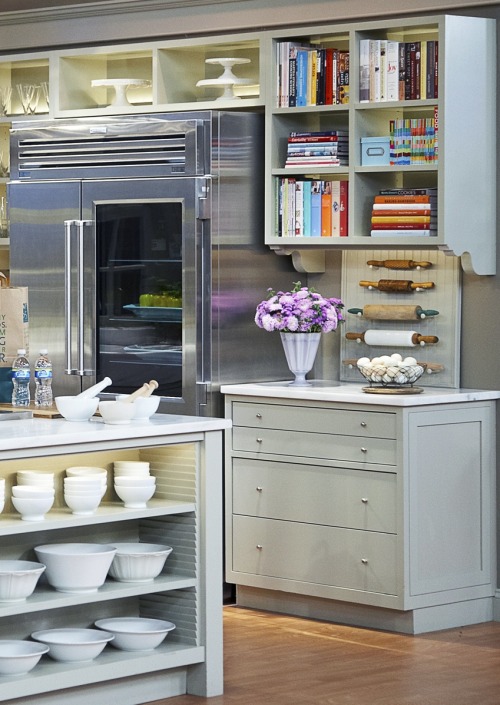
I've never looked at a kitchen photo and said "I want this, exactly this" before..... until now. I'll be honest with you, this post is more for my benefit (bad memory) than for yours. But, please, feel free to drool over the marble counter tops, awesome shelving design, glamorous refrigerator, and fabulous antique rolling pin collection. Found via Basically Anything That is Awesome.
Pin It Now!
Museum festivities
Can you believe it, we actually did something for Valentine's Day?! For our eighth Valentine's Day together we went downtown to the Museum of Fine Arts in Houston with some new friends. Although the 'Street Festival' wasn't all that it was cracked up to be, we all still had a lot of fun. Here are some pics from our little excursion.
We were pictured online in the local newspaper. "Seensters"
Ashley and I with our sunglasses. LOVE!
Pin It Now!
Saturday, February 13, 2010
My Valentine
“Life has taught us that love does not consist in gazing at each other but in looking outward together in the same direction.” -Antione de Saint-Exupery
Friday, February 12, 2010
Stretched Canvas Artwork
 For the last week I have been substitute teaching for a high school computers class.... needless to say, I've been doing a lot of blogging around the internet. Yesterday I found many inspirational ideas for wall decor over the sofa at Julie's beautiful site, BelleMaison. She always has such beautiful photographs and unique design ideas! I fell in love with the idea of hanging a stretched canvas piece over the sofa. Such a statement piece!
Wouldn't it be gorgeous to have the photograph of my little Limelight Hydrangea made into an art piece? I would definitely tweak it; maybe gray out the background so that the lime color pops.
Here are some websites that I've found where you can download your images and they make them up into a piece of art. Amazing!
Wednesday, February 10, 2010
Coral
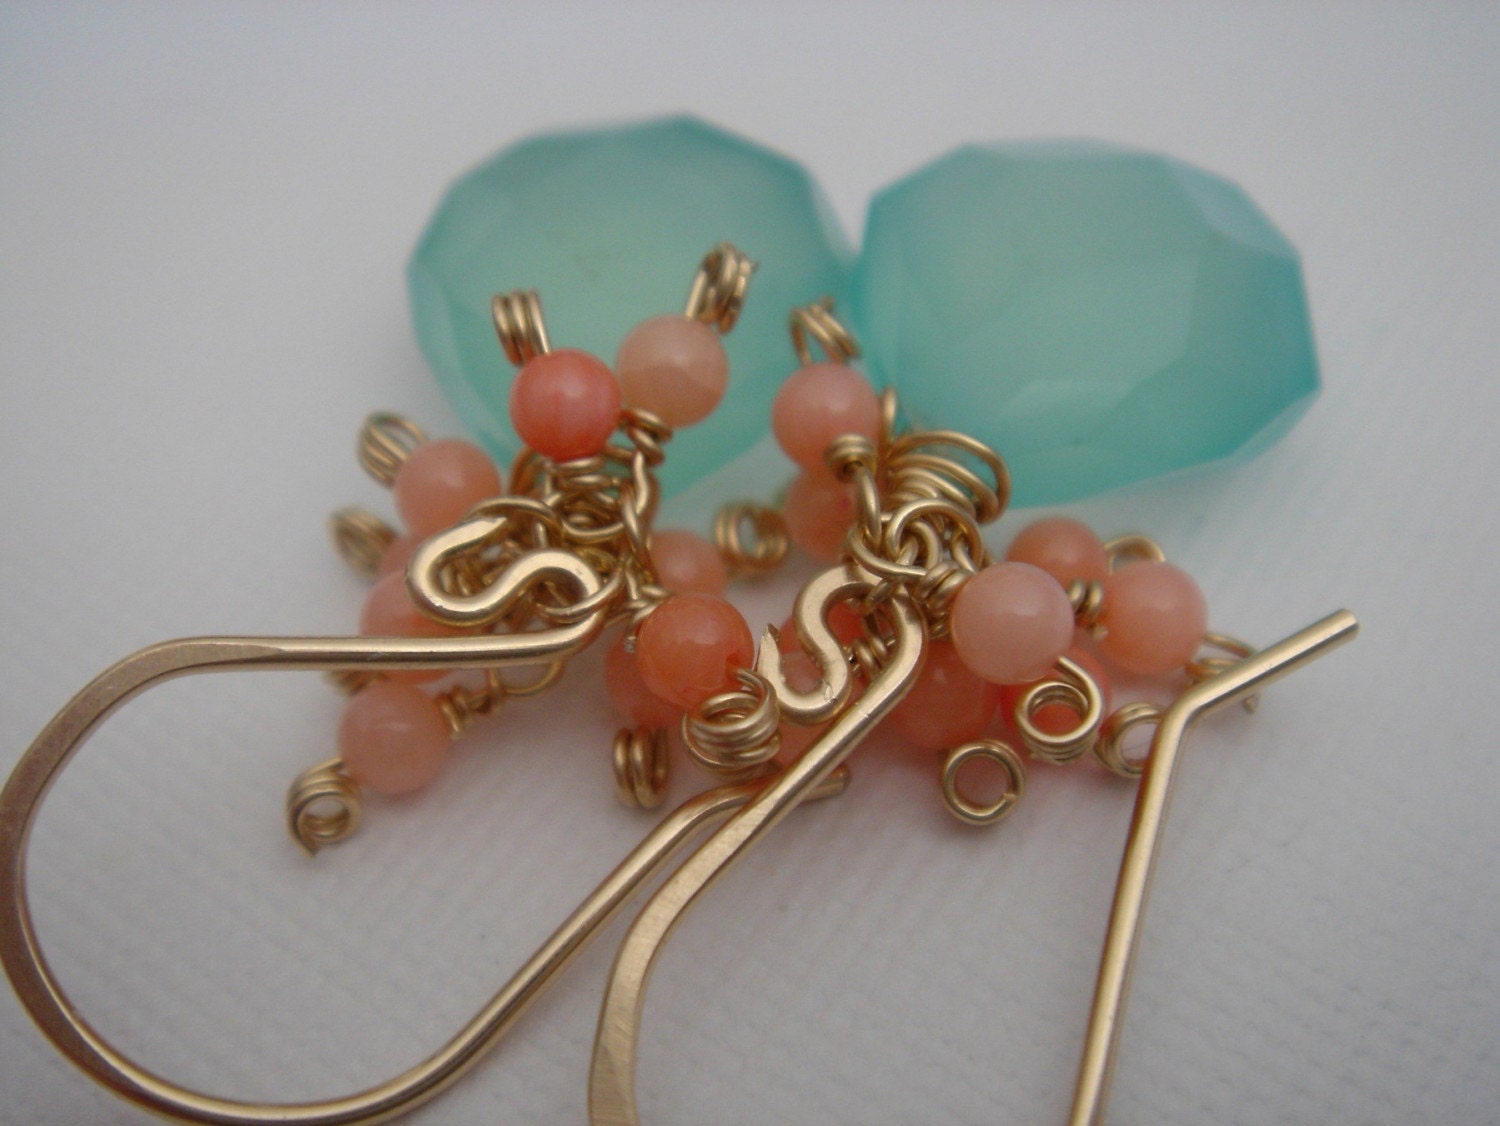
Coral may be a passing fad but I still think it's pretty in small doses. Little pops of color are always refreshing and orange seems to the color of the season when it comes to home decorating. Click on the images to see where they come from.
I love these earrings. I may actually buy something off Etsy instead of just blogging about how much I like them.
These are some pricey little numbers but I'm sure you could find similar frames at a local store and print off coral images.
I just want to reach out and touch these!
Gorgeous... expensive... but gorgeous.
Those accents are so pretty! I really like the symmetry and the pops of orange.
Pin It Now!
Labels:
coral,
Etsy finds,
home decorating,
jewelry
Tuesday, February 9, 2010
Bow Necklaces
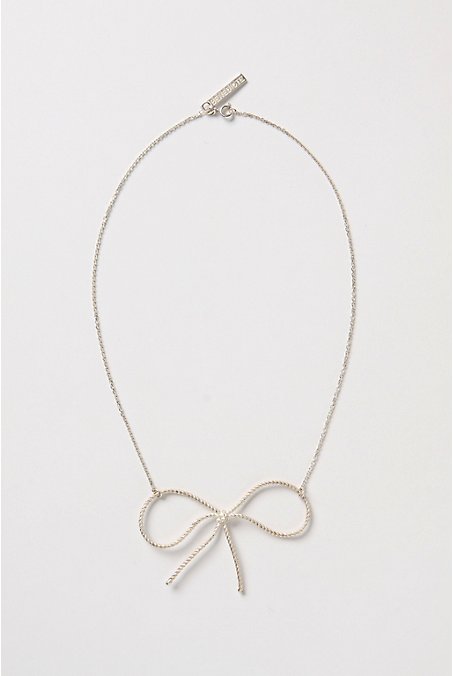
A simple bow is a classic accessory for any piece and a necklace is no exception. The simplicity of these necklaces are very charming, don't you agree? I wonder how easy it might be to make one of these... looks easy enough! Click on the images to go to the sites.
Etsy - $70.00
Anthropology - $178.00
By Boe - $55.00
Juicy Couture - $28.90 SALE
Monday, February 8, 2010
Valentine craft
 This is mostly just a note-to-self kind of post. I SO want to do this with my own class of kids. Wouldn't parents just absolutely love receiving this valentine? I love how simple and relatively easy to clean up this craft is... just be sure to do it right next to a sink for quick hand washing!
Click on the image to see full instructions. Pin It Now!
Dress season
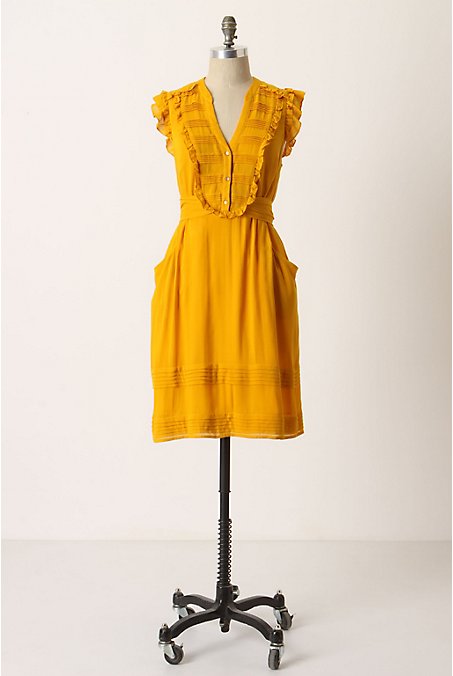
Anthropology has some great dresses this season. I love their simple structure and beautiful patterns. So classically gorgeous. Here are just a few... click on the images to go to their site.
Pin It Now!
Sunday, February 7, 2010
Photo Collage
I've been looking for a way to display some of my favorite photographs but have been struggling with the idea because I have so many! I don't want to have twenty frames on a wall and I certainly don't want to have to pick only three. So this idea has just been a vague notion until I saw Annie's (of Annie's-Eats.com) collage that she put in her new kitchen. I love this idea!
So I hopped on Picasa and whipped up a collage of my own favorite photographs. Love it! Now I'm just dreaming of a kitchen with walls big enough to hang this collage on. =(
L Pin It Now!
Monday, February 1, 2010
Super Bowl Party Recipes
Estevan and I will be hosting a Super Bowl party this year and I am so excited! My goal is to not have to resort to delivery pizza; instead, I'm going to make everything from scratch. Pretty big goal, right? It does, however, become phenomenally easier when you find great blogs like Annie's Eats. Her recipes look delicious and her photographs could be considered artwork. I'm definitely going to try out some of her recipes (stuffed mushrooms, salsa, Car Bomb cupcakes) and revisit one of my own (cornbread) for our party. Here's one of Annie's recipes that I'm really excited about......
Ingredients:
1/2 batch pizza dough (enough for 1 pizza)
4 oz. mozzarella cheese, cubed (about 20-24 pieces)
Sliced pepperoni
Pizza Bites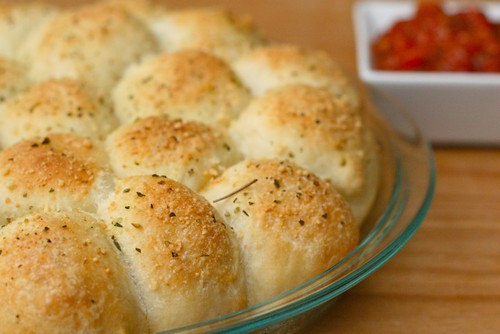 Annie's Eats
 Annie's Eats
Ingredients:
1/2 batch pizza dough (enough for 1 pizza)
4 oz. mozzarella cheese, cubed (about 20-24 pieces)
Sliced pepperoni
For topping:
Olive oil
Italian seasoning
Grated Parmesan cheese
Olive oil
Italian seasoning
Grated Parmesan cheese
Directions:
Preheat the oven to 400˚ F. Lightly grease a 9-inch pie plate or cake pan. Divide the pizza dough into 20-24 roughly equal sized pieces. Take one of the dough pieces, top with a cube of cheese and a slice or two of pepperoni. Pull the edges of the dough around the fillings and pinch closed. Place seam-side down in the baking dish. Repeat with the remaining dough pieces.
Preheat the oven to 400˚ F. Lightly grease a 9-inch pie plate or cake pan. Divide the pizza dough into 20-24 roughly equal sized pieces. Take one of the dough pieces, top with a cube of cheese and a slice or two of pepperoni. Pull the edges of the dough around the fillings and pinch closed. Place seam-side down in the baking dish. Repeat with the remaining dough pieces.
Lightly brush the tops of the dough balls with olive oil. Sprinkle with Italian seasoning and grated Parmesan cheese. Bake for 20 minutes, or until the tops are golden brown. Serve warm, with dipping sauce as desired.
Pin It Now!
Subscribe to:
Comments (Atom)


